BY SACNILK
Boston, August 19, 2023 - Sacnilk possesses the UFC 292 outcomes for the Sterling vs. O'Malley fight card, live blogs covering the complete main card, and additional details from the TD Garden Arena in Boston on Saturday night. ##
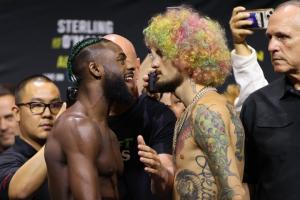
In the headlining contest, Aljamain Sterling might compete in the bantamweight division for the last instance as he safeguards his UFC championship versus Sean O'Malley. ##
UFC strawweight titleholder Zhang Weili defends her belt against Amanda Lemos in the co-main encounter. ##
UFC Bantamweight Championship: Aljamain Sterling (c) vs. Sean O'Malley
ROUND 1: Sterling stands in the cage's center, using distant flicking kicks. O'Malley moves in circles, feinting, looking for chances to counter. A chant of "Forget you, Aljo" comes from the Boston crowd. ##
The first couple of minutes don't bring big changes. Both fighters show respect. O'Malley takes the center, while Sterling keeps testing with occasional long kicks. O'Malley lightly hits Sterling's body, and Sterling replies with three quick inside leg kicks. O'Malley lands one of his own. ##
O'Malley's front left punch is blocked. A while passes with little action. Sterling throws a leg kick, and O'Malley tries a spinning kick but it's blocked. ##
Sterling attempts a takedown, O'Malley balances on one leg as Sterling lands some light punches. Not much to score, but I'd give this round to the champion. ##
ROUND 2: Sterling starts with a body kick. O'Malley attempts a kick but slips, giving Sterling a chance for an immediate takedown that O'Malley defends, creating space between them. As the challenger moves away, Sterling jabs at O'Malley. ##
Suddenly, Sterling charges forward and gets hit by a well-timed counter right from O'Malley! Sterling is visibly hurt, stumbling and falling face-first to the mat. O'Malley doesn't hesitate, quickly moving in for ground-and-pound. He lands a series of strong hits, causing the referee to give Sterling a moment to recover. But O'Malley's accurate strikes continue, and the referee steps in. There's a new champion! Sterling gets up quickly, but he looks more confused than angry about the fight being stopped. ##
WINNER: Sean O'Malley def. Aljamain Sterling via TKO (strikes) - Round 2, 0:51 ##
UFC Women's Strawweight Championship: Zhang Weili (c) vs. Amanda Lemos
ROUND 1: Both women begin in orthodox stances and exchange bounces. Weili employs quick feints and gains control of the center. Lemos switches stances as they assess each other. Lemos throws a swift low kick, caught by Weili, resulting in an immediate takedown! Despite Lemos' agility, Weili adeptly passes her legs and transitions to side control quickly, establishing dominance within the first minute. ##
With Lemos near the fence, Weili exerts pressure through subtle shots. Employing effective head positioning, Weili keeps Lemos pinned, delivering forceful left-hand strikes. Weili maintains control over Lemos, even securing a leg to control her against the fence. She follows up with impactful strikes. Lemos' shift prompts Weili to deliver powerful left-hand blows, putting Lemos in a difficult situation. ##
A notable scramble occurs, as Lemos attempts a D'Arce choke. Weili maintains her top position, defending against the submission. Lemos lacks the leverage to complete the move. Weili escapes, seizing Lemos' back, and lands heavy strikes. Lemos moves and shifts to evade danger. Although Lemos survives the intense moment, Weili continues her top control, peppering Lemos with significant left-hand strikes. Lemos struggles to break free, managing to endure until the round's end. Just before the bell, Lemos attempts another D'Arce choke, thwarted by Weili's slam. ##
ROUND 2: What a thrill! Lemos keeps her cool on the stool despite taking a beating. And that D'Arce attempt could've been a game-changer if Weili wasn't so sharp. Lemos starts with energy, taking center stage and swinging, but no luck this time. Weili uses feints and bounces while throwing a low kick. Lemos lands a significant right hand, which Weili handles well. Lemos attempts a front kick that Weili almost catches. Both women move with angles. Weili delivers a stepping side kick to the body. Lemos scores with a brutal right hand, hitting her mark. She's getting comfortable, but the action gets chaotic as Weili secures a body lock, taking Lemos down. Weili quickly transitions to side control, right at the center of the cage. ##
Lemos tries to close the gap, but Weili displays her strength. Weili initiates a crucifix attack, looking to transition to mount, but Lemos manages to secure a leg, ending up in half guard. Weili maintains her weight and delivers small shots, demonstrating excellent shoulder pressure. Weili attempts to change position, but Lemos defends well with her legs. Weili resorts to landing elbows, maintaining pressure and limiting Lemos' movement. Lemos attempts to buck and roll, but Weili maintains top control, then swiftly moves to Lemos' back in an impressive sequence. She takes Lemos down into a complete backpack position, showcasing impressive transitions. ##
Lemos fights to escape, managing to rise with Weili still holding on. Weili transitions to side control as Lemos secures a leg for guard. The champion postures up, delivering elbows. Lemos lifts herself and returns to her feet. Weili holds onto an overhook, landing a solid elbow and body knees, before again taking Lemos down. She's asserting her dominance. This time, it's full guard, and Weili postures up and advances. Lemos turtles, and Weili takes her back. Lemos positions herself against the fence using her left side, while Weili remains relentless. Lemos clings to her right arm to fend off punches as the round concludes. ##
ROUND 3: Lemos shows signs of fatigue but remains resilient, suggesting she's still in the game. She landed notable shots, as highlighted by Weili's corner. Recognizing Lemos' potential desperation, they aim to secure a victory in this round. Lemos starts at the center, quickly overtaken by Weili. Lemos adopts a cautious approach, avoiding rushed moves, while Weili remains wary, knowing a clinch could seal the deal. The opening minute lacks excitement, both missing their combos. Lemos tries a knee, but Weili evades and clinches. Lemos briefly gains control against the cage, but Weili counters with a powerful elbow, reclaiming dominance and subsequently taking Lemos down. ##
Weili rises and focuses on Lemos' legs with kicks. Lemos takes a breather. Weili maneuvers into guard, using punches to transition to side control swiftly. Lemos lies flat, signs of fatigue becoming apparent. Despite attempting to hip in, Weili circles and takes Lemos' back. Weili secures hooks, flattening Lemos. Lemos attempts to roll, but Weili maintains the backpack position, attempting a choke. Lemos resists, ending up belly down again. She then secures half guard, displaying strength. ##
Weili targets shots, while Lemos concentrates on defense, shifting away from submissions. Weili transitions to knee-on-belly position. Lemos stands, yet Weili keeps her near the fence, delivering a fierce elbow and minor shots. Lemos displays fatigue, as Weili takes control. Weili releases a combination when they break. The champion throws a 1-2 combo, and Lemos counters at a slower pace. Her strikes lack the earlier impact. Weili controls the pace, pushing Lemos back. As time dwindles, the round concludes without major developments. ##
ROUND 4: Lemos' striking stats are significantly lower with only 9 strikes compared to Weili's 158. More 10-8 rounds might have been appropriate given the gap. Lemos appears okay but noticeably heavier. Her enthusiasm is still there, yet somewhat diminished. Lemos initially takes the lead, but there's little action in the first 30 seconds. The pace remains patient. Another 30 seconds pass with a similar tone. Weili moves around Lemos, adding leg kicks. ##
Lemos attempts counters with reduced speed and impact. Weili opts for a cardio kickboxing approach, using light shots and maintaining a high guard, mainly focusing on kicks. She's clearly waiting for Lemos to make a move for a takedown counter. Lemos connects with a left and another. The second briefly stumbles Weili, but she recovers swiftly. Lemos nearly lands a strong elbow. Nevertheless, Weili responds with a powerful right hand, converting it into a double-leg takedown—impressive execution. ##
Lemos then attempts a D'Arce choke, focusing on Weili's neck. However, Weili escapes, regains her footing, and lands an elbow before creating space. Weili's pace slows, and Lemos audibly catches her breath. Determination persists, but Lemos' strikes lose accuracy. She lands a right but faces a combo from Weili. Lemos turns reckless, swinging wildly as Weili evades. Weili's high kick connects. Both fighters display fatigue, yet Lemos charges forward, swinging fervently as the bell rings. ##
ROUND 5: Lemos seeks a finish, relying on determination. Round four was even, and Weili looks rejuvenated after her corner's advice. Lemos is slower, while Weili remains agile. Weili starts with effective side kicks and a solid body kick. Weili's devastating right hand stuns Lemos, followed by punishing shots. Lemos attempts a leg lock, but Weili counters. Lemos shows resilience. Lemos scrambles, Weili keeps control. Lemos fights back. ##
Lemos endures Weili's strikes, while Weili secures takedowns. Lemos keeps resisting. Lemos rises, Weili controls and lands shots. Weili takes Lemos down again, focusing on side control for a potential finish. Weili might tire after the exchange. Both tire. Lemos endures, Weili maintains control. Lemos takes hits. Lemos rises, targets Weili's neck. Weili avoids. Time runs out. Lemos charges, fight ends. ##
WINNER: Weili Zhang def. Amanda Lemos via unanimous decision (50-43, 50-44, 49-45). ##
Welterweight: Neil Magny vs. Ian Machado Garry
ROUND 1: Both fighters start in orthodox stance, but IMG quickly employs calf kicks to take Magny down to the mat twice in rapid succession. Despite the takedowns, Magny gets up each time, and the action continues. IMG lands another powerful calf kick within 10 seconds, showcasing his effective strategy. Magny's smaller legs may make him more susceptible to these kicks. Despite the takedowns, IMG maintains speed and movement, landing accurate right hands and more calf kicks. Magny attempts to parry a jab and initiates a clinch, but IMG escapes swiftly. The calf kick strategy persists, enabling IMG to evade Magny's advances while landing strikes. ##
Magny presses forward, seeking engagement, but IMG counters with a combination and secures a clinch against the cage. They exchange briefly within the clinch, leading to Garry tripping Magny to the mat. Magny briefly sits before standing up. IMG seizes the center and successfully lands another leg kick. Another calf kick takes Magny down again. Magny resorts to a butt scoot, slowing the fight's momentum. Magny regains his footing, and IMG throws a glancing head kick. Magny attempts to capitalize but fails to take down IMG due to his impressive balance. Another low kick affects Magny, and the round concludes with both fighters making it to the end. ##
ROUND 2: Magny's corner expresses dissatisfaction with his performance and encourages him to intensify his efforts. Despite his attempts to advance, Magny struggles to gain an upper hand against IMG. The second round echoes the previous pattern, with IMG delivering smart long-range strikes, particularly impactful leg kicks. However, Magny's condition deteriorates as he endures another calf kick, resulting in an evident limp. The repeated kicks drive Magny against the fence, exacerbating his leg damage. ##
Seizing an opportunity, Magny seizes a clinch as IMG becomes overly aggressive, aiming to bring him down. Despite his compromised leg, Magny maintains a rear waistlock, asserting control against the cage. Eventually, Garry maneuvers to break free, utilizing the cage to escape the hold. After more clinch exchanges, IMG manages to disengage with 2 minutes left in the round. Magny maintains pressure, but a head kick from IMG dislodges his mouthpiece, leading to a brief pause for retrieval. After the restart, another low kick intensifies Magny's discomfort, visibly affecting his mobility. Although IMG attempts a flying knee that narrowly misses, Magny, despite his compromised state, perseveres and endures the round. ##
ROUND 3: After the round ends, IMG playfully expresses his feelings towards Magny, reflecting the pre-fight trash talk. This tension is evident in their octagon showdown, with Magny experiencing the consequences. The next round sees Magny initiating an offensive, countered by a blocked head kick from IMG. A takedown attempt by Magny results in a butt scoot, with a subsequent calf kick hindering his mobility. IMG capitalizes, unleashing strikes against the fence, including another leg kick that drops Magny momentarily. ##
IMG continues to exploit Magny's compromised leg with body kicks, punches, and calf kicks, limiting Magny's response. A teep rocks Magny's face, and he covers up under IMG's onslaught. In a clinch, Magny is taken down by IMG, seeking a late finish. Despite his adversity, Magny holds on until the end, as IMG disengages, symbolizing the culmination of their rivalry. The fight's outcome prompts Magny to reflect on his approach, both in and out of the octagon. ##
WINNER: Ian Machado Garry def. Neil Magny by unanimous decision (30-26, 30-26, 30-24). ##
Bantamweight: Da'Mon Blackshear vs. Mario Bautista
ROUND 1: Blackshear and Bautista start in orthodox stances. Blackshear moves to the center, fighting tall, while Bautista adopts a lower stance and employs low kicks. Bautista rushes, narrowly avoids a counter, and the two grapple briefly. Blackshear secures a body lock, Bautista defends, and they spin playfully. Blackshear takes Bautista down against the fence, but Bautista scrambles up. They exchange clinch shots, then Bautista presses forward. ##
Blackshear responds with low kicks and a takedown. Bautista gets up, but Blackshear trips him down. Bautista escapes a guillotine attempt. Blackshear escapes the choke, Bautista stands, and Blackshear lands a shot before the round ends. ##
ROUND 2: Bautista starts aggressively with power shots and a flying knee attempt. Blackshear counters with a well-timed knee and engages in a clinch. They separate, and Bautista lands a significant strike. Bautista changes strategy, attempting a double-leg takedown. Blackshare defends near the fence, using effective elbows in the clinch. Bautista also lands an elbow. Blackshear employs economical striking. Bautista pursues powerful shots and another clinch takedown attempt, while Blackshear responds with a solid knee and elbow. ##
Bautista switches positions and maintains pressure, leading Blackshear to retreat. Bautista delivers a notable body shot. Blackshear alters course and initiates clinch wrestling. They separate, and Blackshear lands an elbow. Blackshare's takedown attempt is thwarted by Bautista's defense. Bautista continues to pressure, forcing Blackshear backward as his energy diminishes. Blackshear engages in a clinch, delivering uppercuts. Bautista secures a clinch, delivering impactful elbows as the round concludes. ##
ROUND 3: Blackshear appears fatigued but still secured the round, despite concerns about appearance. Bautista displayed strength in the latter half. Bautista starts aggressively with a solid right hand, pressuring Blackshear against the fence. Blackshear counters effectively with a right hand, but Bautista maintains his offense. Both engage in clinches, with Bautista landing elbows and knees to the body. ##
Bautista continues his clinch dominance, wearing down Blackshear with elbows and body shots. He executes a takedown, while Blackshear seeks to stand but ends up on his back. Bautista maintains control, despite audience reaction. Blackshare escapes, and Bautista's pressure persists. As the round ends, Blackshear lands a right hand, momentarily toppling Bautista. Bautista secures a takedown just before the round concludes, ending a strong fight. ##
WINNER: Mario Bautista def. Da'Mon Blackshear by unanimous decision (29-28, 29-28, 30-27). ##
Bantamweight: Marlon Vera vs. Pedro Munhoz ##
ROUND 1: The bout begins with Vera taking the center stage. Both fighters adopt a southpaw stance. Munhoz initiates the action swiftly with leg kicks and nimble movement, gradually wearing down his opponent. Vera seizes an opportunity and catches one of Munhoz's leg kicks, using it to trip Munhoz down. However, Vera doesn't pursue further. Munhoz promptly returns to his feet, and the fight resumes at a distance. Munhoz sets a brisk pace from the start, consistently employing low kicks. Vera employs a well-executed jab down the middle. Although Vera's longer reach is evident, Munhoz avoids getting within punching range, maintaining movement and peppering Vera with his kicks.##
Munhoz employs a rapid sequence of strikes, often delivering three strikes for every one from Vera. The focus is on the numerous kicks Munhoz unleashes, not necessarily heavy in impact but abundant in number. Vera adapts and begins to find his timing, successfully landing intercepting jabs as Munhoz maneuvers. Notably, Vera responds with a powerful low kick of his own. Munhoz attempts a takedown with a bare double-leg effort, but Vera effectively thwarts the attempt and counters with a jab. Vera's offense hasn't featured many power shots up to this point, while Munhoz persists in pressuring Vera and maintaining his flurry of strikes. Vera manages to connect with a solid left hand and transitions to an orthodox stance.##
A combination from Vera falls short, and Munhoz retaliates with a pair of left-hand strikes from his southpaw stance. Munhoz presses forward, staying close to Vera and continuously delivering strikes. Although Vera observes a lot, his offensive output remains relatively restrained. Both fighters continue to exchange low kicks. Munhoz utilizes a shifting right as he moves forward, prompting Vera to prime his counterpunches. Vera lands a hook to Munhoz's body, but Munhoz maintains his relentless pace and pressure. As the round concludes, Vera lands a well-placed fall-away left, showcasing his resilience amidst Munhoz's onslaught. ##
ROUND 2: The first round unfolded almost exactly as anticipated: Vera delivering more power shots, while Munhoz maintained higher volume. It was an exceedingly close round, with the eventual outcome resting on the judges' scoring. Both fighters resumed the second round in a southpaw stance, consistent with their initial positioning. This aligns with their previous round, where they also displayed some stance switching. Munhoz promptly resumed his brisk pace, which Vera quickly matched by landing an early left hook. Munhoz remained undeterred and began committing more fully to his punches.##
Vera demonstrated his prowess by employing a snapping front kick and his jab, capitalizing on his longer reach. Munhoz effectively countered by luring out Vera's jab and then connecting with a hook over it. Munhoz reduced his reliance on kicks while Vera maneuvered to keep Munhoz on the defensive. Subsequently, Vera succeeded in pushing Munhoz backward. An attempted combination by Vera was disrupted by Munhoz's forceful right hook. Munhoz reverted to leg kicks while Vera sustained his consistent use of the jab. Munhoz progressively found opportunities for his hooks when Vera followed up his jab with additional strikes. Munhoz's skillful right-hand punches garnered notable recognition, and both fighters consistently managed to score without taking any clear shots. Munhoz also entered a rhythm with his jab, adding to his growing offense. Vera explored body attacks with kicks, a strategy that yielded some favorable results. Munhoz launched a forceful charge, yet it failed to find its mark.##
Maintaining his high output, Munhoz intensified his punch combinations, a move that didn't go unnoticed. Vera responded by switching stances and landing a 1-2 combo, accentuated by his persistent jabbing. Observing Munhoz's stance-switching strategy, Din Thomas pointed out that Munhoz adjusted his stance in sync with Vera's movements, thereby exploiting opportunities to land the lead calf kick. This pattern persisted. The exchange of combos remained constant, with Vera displaying adept interception skills while Munhoz sustained his flurry of punches. ##
ROUND 3: Munhoz swiftly delivers an impressive left hook at the start. Vera responds with a jab and follows it up with a well-executed combination. Vera escalates his offensive output, causing Munhoz to absorb more strikes. Despite Munhoz's active involvement, he begins to take some hits. ##
Vera maintains a close range, effectively catching Munhoz off-guard. Munhoz struggles to find a safe position between moves. Vera's combination connects with precision, prompting Munhoz to initiate a takedown attempt as he appears to sustain some damage. Vera successfully defends the takedown, and his offensive momentum continues. A 1-2 combo and a counter land effectively for Vera, who is now unleashing combinations, leading to Munhoz bleeding under his right eye. Vera's consistent jabbing persists, and Munhoz struggles to evade it, exposing himself to Vera's combo attacks. Vera adds a well-executed body shot to his arsenal. Munhoz remains in close proximity to Vera, yet Vera effectively establishes a suitable distance, placing Munhoz within striking range. ##
This round proves to be highly favorable for Vera, who delivers a powerful left hook with significant force. Munhoz attempts to press forward, but he repeatedly absorbs shots in the process. Vera expertly counters Munhoz's advances. Munhoz's capacity to navigate space and block Vera's combinations diminishes, and he veers away from his earlier leg kicks. Munhoz manages to land a pair of effective body kicks, earning recognition from Vera. Munhoz adopts a forward-moving stance, launching sizable strikes to deter Vera. However, these attacks fail to find their target. As the round nears its conclusion, both fighters exchange spinning kicks that ultimately miss their mark, concluding a captivating and entertaining fight. ##
WINNER: Marlon Vera def. Pedro Munhoz via Decision (unanimous) (30–27, 30–27, 29–28) ##
-Brad Tavares def. Chris Weidman via unanimous decision (30-27, 30-27, 30-27) ##
-Gregory Rodrigues def. Denis Tiuliulin via first-round knockout (elbow) ##
-Kurt Holobaugh def. Austin Hubbard via second-round submission (triangle choke) ##
-Brad Katona def. Cody Gibson via unanimous decision (29-28, 29-28, 30-27) ##
-Andre Petroski def. Gerald Meerschaert via split decision (29-28, 28-29, 29-28) ##
-Natalia Silva def. Andrea Lee via unanimous decision (30-27, 30-27, 30-27) ##
-Karine Silva def. Maryna Moroz via first-round submission (guillotine choke) ##
Stay Tuned To Sacnilk...

 UFC News